Peruvian Alpine Climbing Adventures
Clothing+Equipment List
General Notes
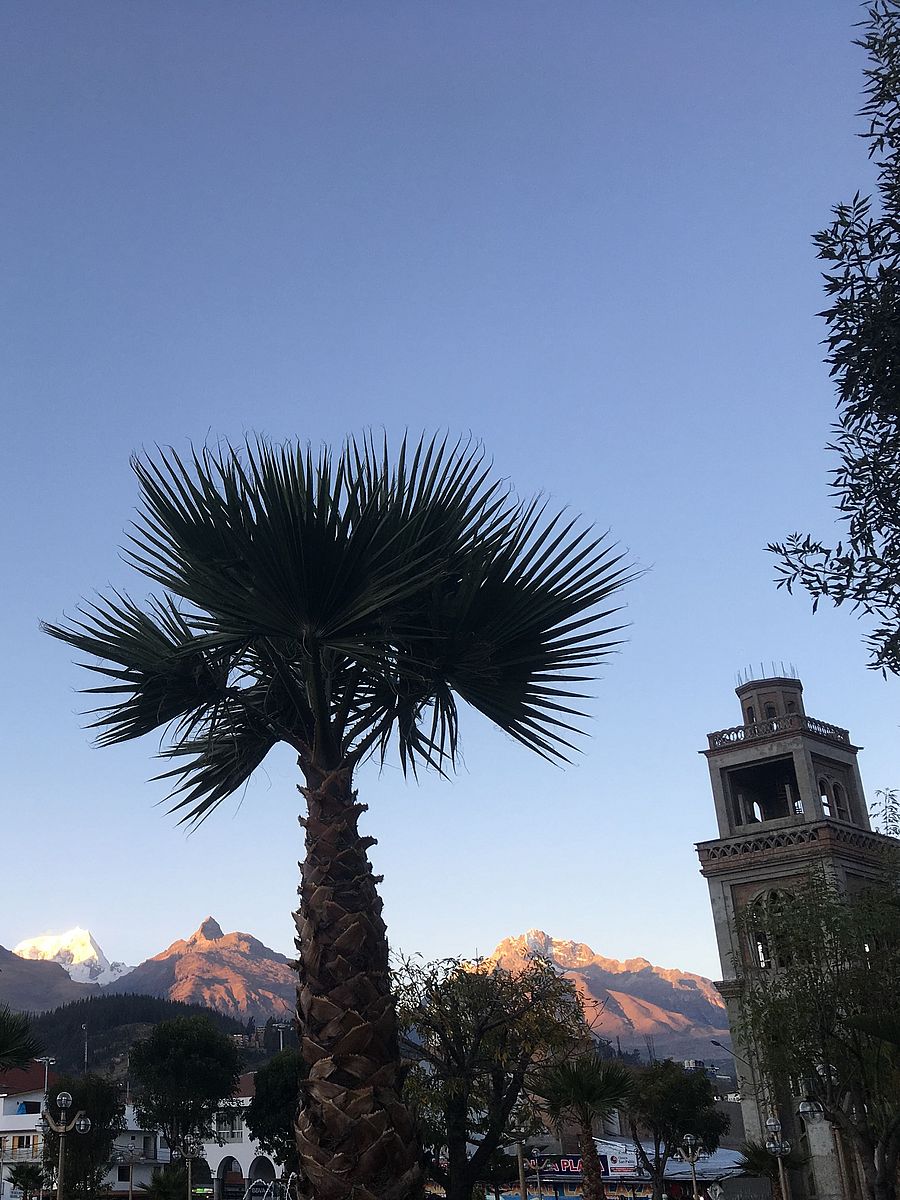
This is the basic clothing and equipment we suggest for climbing 5500-6000+m peaks such as Yanapaccha, Ishinca, Urus Este, Tocllaraju, Artesonraju, Alpamayo, Ranrapalca, Chopicalqui, and similar Cordillera Blanca mountains. Hauraz has many outdoor stores for any last-minute items you may need, but overall the prices are higher and the selection is more limited than in the US.
For US-based purchases, we strongly recommend you check out Outdoor Gear Exchange. This independent outdoor retailer, based out of Burlington VT, has knowledgeable staff, a wide selection of quality gear, and very competitive pricing. And if you visit the Burlington bricks-and-mortar store, they've got great consignment deals (and don't forget to bring your own to consign).
We highly recommend Ortovox for all of your pack and clothing needs. Ortovox offers top-of-the-line quality, innovative style, and solid mountain performance, all produced with sharp attention to the environmental and labor stream.
As you go about putting your clothing and equipment together, let us know if you have any particular questions that your gear retailer can't answer.
Pack+Travel
1-2 Duffel Bags: For travel to Peru. 50-75 liters are good sizes. TSA approved travel locks can be useful—we've never had a problem in Peru, but this is a simple security step.
1 Backpack: One beautiful thing about Peruvian climbing is that our approaches will be assisted by mules and porters, so packs can be smaller. A 40-50L pack will work well. Simple packs specifically suited for alpine climbing (i.e., a pack without lots of external pockets and straps and with a relatively light waist-belt) work best. The Ortovox Peak 45 is highly recommended.
Approach+Acclimatization
1-2 Trekking Poles: Collapsible. There are many good models out there. We recommend a “flick lock” system versus a “twist-to-tighten” system, as those tend to freeze up and/or break easily.
Climbing Gear
1 Helmet: If you're bringing one of the lighter-weight polystyrene-type modern helmets, we strongly recommend that you either package it very well in your checked baggage or bring it with your carry-on, as they crack quite easily.
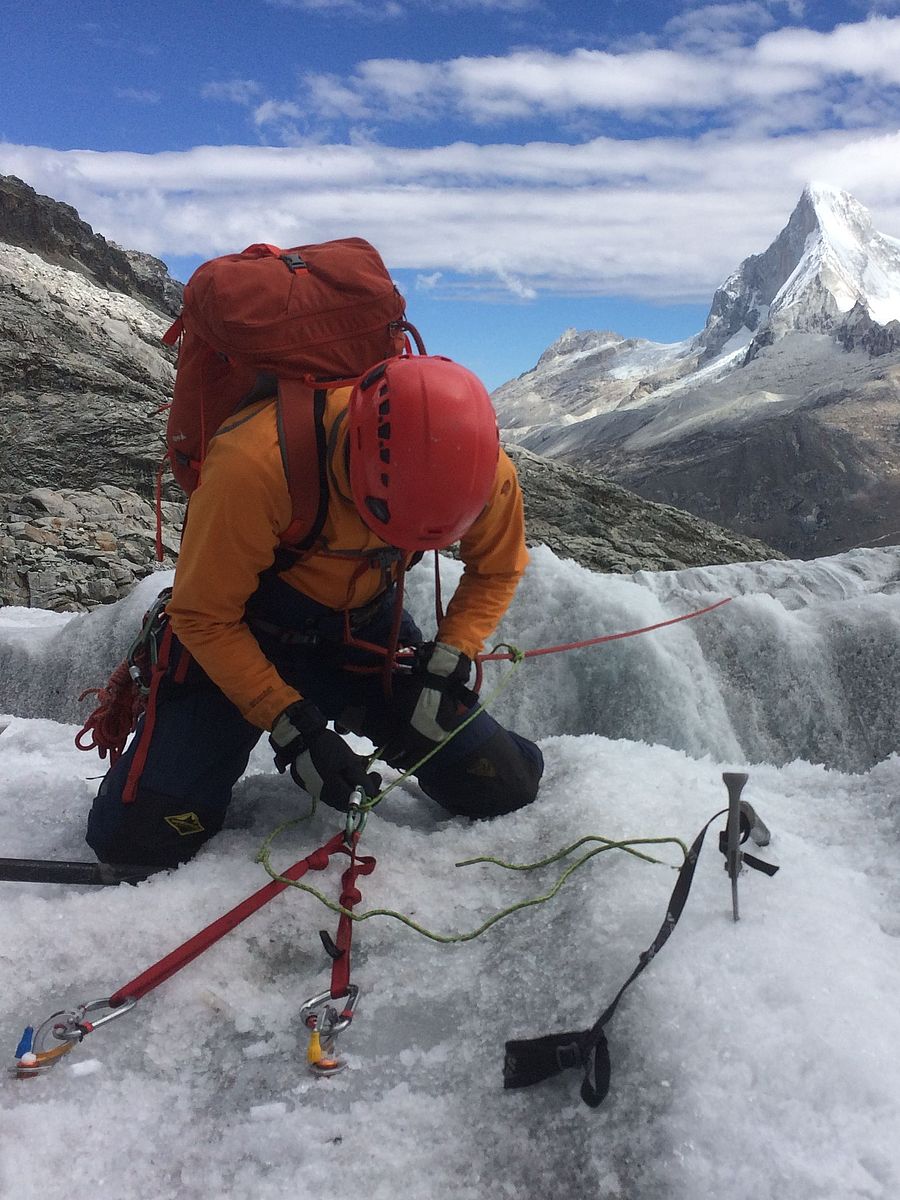
1 Harness: Best if it compatible with ice clippers, like the Mammut Togir Slide, as you'll need to be racking screws during the climb. Ask a sales rep to confirm your harness has this feature before purchasing. If you already have a harness without this feature, we can tape the ice clippers on, but having slots on your harness for ice clippers work best.
1-2 Ice Clippers: Though they are much pricier, if you're looking to ice climb into the future and want to avoid lost gear and heartache, we highly recommend the beefy, metal DMM Vault-Gate, but Black Diamond Ice Clippers can work as well. Two is ideal for easy racking on either side, but one can work.
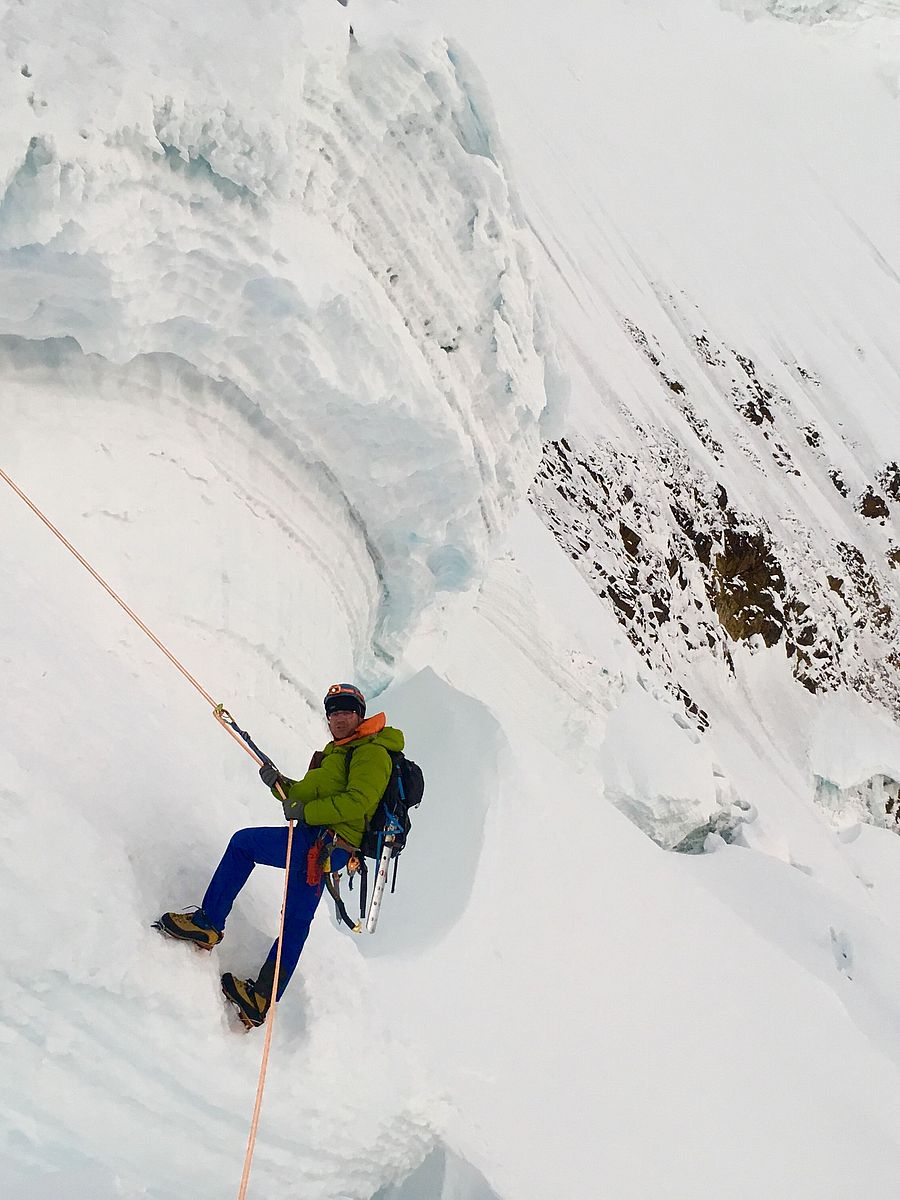
2 Technical Ice Tools: We need to be prepared to climb 40-90 degree snow and ice. We don't need super-technical ice tools, but we do need something beyond ice axes. The Petzl SumTec is a great option for this and future alpine climbs. If you think you'll be exploring a lot more vertical ice and want a tool that works well for both alpine ice and vertical ice, then consider something like the Petzl Quark, CAMP X-Alpine, or similar. For alpine climbing, it is best if one tool has an adze and one tool has a hammer.
1 Tool Tether: It's a looong way down from the summit and we don't want to drop our tools! While we don't want or need wrist leashes on our ice tools, tethers attaching them to our harness is a very good idea. We particularly like the BD Spinner Tether.
1 Crampon Pair: Horizontal front points work best for the alpine mix of steep snow and ice that we'll be climbing. We particularly enjoy the BD Snaggletooth, as it offers good kick penetration and mixed climbing versatility, but any 12-point crampon can work. Remember to be very sure to make sure that the crampons you're planning to bring to Peru fit the boots you're planning to bring to Peru!
1 Belay Device: Any tubular-style “ATC” belay device works. If you're looking to progress with your multi-pitch climbing, spend the few extra dollars to get a “Guide” style “plaquette” belay device like the Petzl Reverso.
1 Petzl Microtraxion (optional): This device melds a pulley with a “progress-capturing” cleat, making it useful for crevasse rescue. (Like any tool, it's only useful if you've educated yourself about it. We'll build time into our itinerary in Peru to include crevasse rescue instruction/review).
1 Petzl Tibloc (optional): The Tibloc is a stripped-down ascending device that can be useful for crevasse rescue. (Like any tool, it's only useful if you've educated yourself about it. We'll build time into our itinerary in Peru to include crevasse rescue instruction/review).
2 Prussik Loops: Use 6mm cord, joined together in a 48cm loop using a double fishermans knot.
1 Double Length/240cm Sling, Nylon: Useful for rappeling. This BD Sling is a good option.
4 Locking Carabiners
4 Non-locking Carabiners: For racking gear on your harness—don't waste locking carabiners on this.
Camp Life
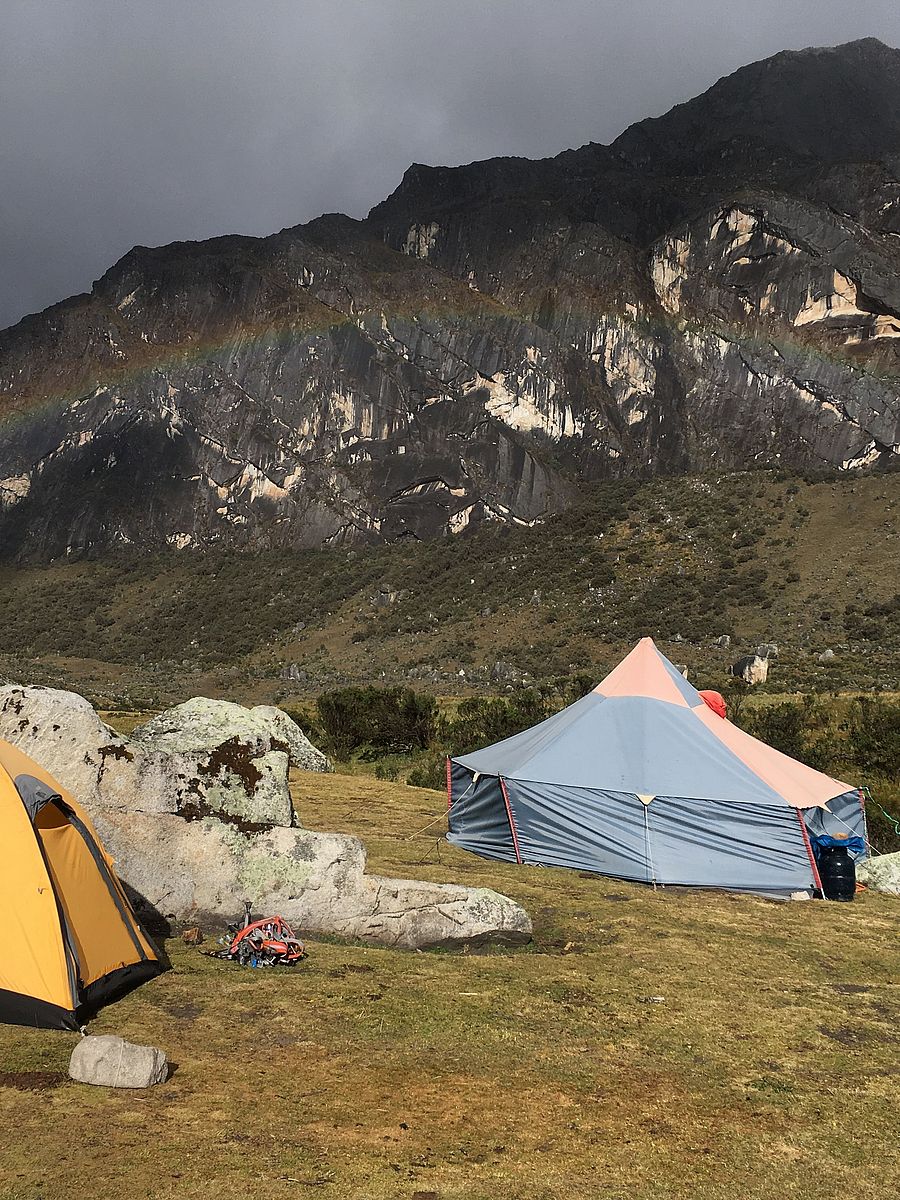
Tents: We have a range of 2-3p tents that we can supply; however, one of the luxuries of Peruvian climbing is that with porter and mule assistance, if you have your own 1-2 person you'd like to use, you can. We find that this promotes sleep, particularly given the way altitude can affect sleep breathing, etc. The BD First Light is a common option; however with the First Light, you absolutely must apply the SeamSeal that BD provides and then purchase/apply a water repellent like this Nikwax product. Another good option is MSR Advance Pro. You'll find info about it and about other similar tents thoroughly reviewed HERE.
1 Sleeping Bag: People's individual furnaces vary while sleeping, but we suggest a bag in the 0 to 20F range. This works well for Base Camp sleeping and at High Camp you can sleep with a few layers on. Down-filled bags have a higher warmth-to-weight ratio than synthetic fill bags and are highly recommended.
1 Compression Sack: These make your sleeping bag a lot more compact for packing. Granite Gear is one good brand, buying the size that best fits your sleeping bag.
1 Sleeping Pad: We like the compact and comfortable Thermarest NeoAir line.
1 Pee Bottle: If you have experience using these, they can be useful while tenting. Collapsible bottles like the 2L Nalgene Cantene wide-mouthed bottle work well. Women may like to use a pee funnel like the GoGirl (definitely practice prior).
2 Headlamps: Good to have one high-beam option for your main lamp and one smaller one as a back-up. The Petzl Aktik Core is a good high-beam option. The Petzl Bindi is a good back-up option.
1 Battery Charger (optional)
1 Solar Panel (optional)
Kindle/Audiobooks/Podcasts/Cards/Etc: During acclimatization and in the event of weather variables, we'll have hang-out time in camp, where it's nice to have some entertainment.
Food+Hydration
1 Bowl/Cup/Spork: In Base Camp, we'll use “proper” dishes and utensils, but for High Camps, you'll need a bowl, cup, and spork. We really like the packability and versatility of the Fozzil line.
Insulated Mug (optional): Nice for keeping beverages hot, but at Base Camps we will have kitchen mugs if you choose.
2 Liter Water Bottles: Should be wide-mouthed so they don't easily freeze and are easy to fill. Collapsible bottles allow for easier packing. We like the 2L MSR Dromedary—lightweight, collapsible, and very packable. You can bring a Camelback if you want for the approach hikes, but these won't work for the summit climbing, as they freeze.
Steri-Pen (highly encouraged): For purifying water on-the-go. We'll have one of these on hand in camp. It is an excellent idea to have one of your own for international travel, so that you're not producing tons of plastic bottle waste in the countries you enjoy visiting (many of these countries don't have proper recycling or even waste disposal, so the bottles get burned). Rechargeable ones are the way to go.
High Camp Meals: One breakfast/dinner for each day at High Camps. Discuss with us the particular needs of your climbing plan.
Favorite Snacks/Bars/Gels/Etc: We'll have lots of good meals and snacks on hand, but if there are particular things that you absolutely love to have for your climbs, you should plan to bring a supply from the states.
Clothing+General Gear
Head
1 Warm Hat: Make sure it fits well under your helmet.
1 Sun Cap
1 Neck Gaiter: Buff or similar
1 Headlamp: Rechargeable ones have come a long way and can be recharged via solar in camp.
2 Sunglass Pairs: Good to have one pair as a back-up. Must have some wrap-around protection and/or side filters.
1 Goggle: On cold, windy alpine mornings these can be essential. Light/amber tint recommended.
Spare Glasses/Contacts: As needed.
Hands
1 Thin Glove: Glove liner-weight. We strongly recommend a liner-weight glove that will easily fit under your heavier gloves. This allows you to remove your hand from the heavier glove and do more technical tasks while still having some protection from the elements.
1-2 Medium Glove: The OR Vitaly Glove is a good option.
1 Thick Glove: The OR Alti Glove or lobster-claw mitten like the OR High Camp are good options.
Feet
1 Boot Pair: For peaks over 6000m, a double-boot is highly recommended. If your feet run cold, they are advisable for all Peruvian peaks. Things get quite chilly up there, especially when the sun hasn't yet risen. When departing for the summit, it is nice to not even have to think about or worry about if your feet will be warm enough. And the really nice thing in Peru is that the approaches to Base Camps and High Camps can be done in trail shoes, so it's not like you've got to clunk around in heavy boots much. We advise a double boot like the Mammut Nordwand or similar. If you opt for a lighter weight boot, definitely plan to bring some toe-warmers for summit day.
1 Trail Shoe Pair: All of our approaches to Base Camp and most of our approaches to High Camps can be done in trail shoes! And since our approach packs will be light (~30lbs), most people don't need additional ankle support. Pick a shoe with good tread. Many climbers seem to think that climbers need to wear “approach shoes” with sticky rubber—that's only the case if you'll be traveling over a lot of exposed rock. Most of our approaches will be trail approaches. Choose the appropriate tool for the task.
3 Sock Pairs: Wool is great for keeping odor low. We recommend Vermont's Darn Tough socks—with a lifetime warranty. No cotton! Two heavier-weight pairs and a medium-weight pair is optimal.
Liner socks (optional): These can be good if you're using toe-warmers. Put the toe-warmers on the top of the liner, then roll your other sock over it.
1 Gaiter Pair (Optional): Depending on the boot you use and the pants you wear, gaiters could be a good idea. Gaiters help prevent snow/dirt getting in your boot and prevent tripping on/ripping your pants. If you boot has an integral gaiter, like the Mammut Nordwand, you don't need gaiters. Or if you have pants with low-profile, tight ankle cuffs, you may not choose to use them either.
Upper/Lower Body
We think of layering as a “3W” system: Wicking (base), Warmth (insulation), and Weather (shell) layers. There are lots of layering options out there—fleece, wool, down, and synthetic fill—so there are a variety of ways toward the “layering summit,” the key is to make sure you'll be warm when standing up the real one. Generally, base camp alpine day times are cool and pleasant and night times are crisp. Summit days can be bracingly cold. And while the skies generally range from clear to partly cloudy, rain and snow are definitely possible.
Laundry services are available at most Huaraz accomodations, with overnight express service available.
Lower Body
2-3 Pair Boxer/Briefs/Underwear: Wool or synthetic. No cotton unless in town.
1 Pair Long Mid-Weight Underwear: Wool or synthetic. Here are some good sample options.
1 Pair Mid-Weight Soft-shell Pant: For climbing.
1 Pair Light-Weight Soft-shell/Trekking Pant: For acclimatization/approach hikes and base camp.
1 Pair Hard-Shell Pant: Must have ¾ or more side zip, so that you can put them on with crampons on and access the belay loop of your harness. Be absolutely sure to test this prior to arriving in Peru.
1 Pair Insulated Pants (optional): If you run really cold, these could be useful for summit day. Full or ¾ side zip is necessary.
Upper Body
2-3 Long Underwear Tops: Light or midweight. Only one to two tops are needed at basecamp, but you may wish for an extra for washing in between acclimatization hikes and base camp times. Wool or synthetic. Here are some good sample options.
1-2 Light-Weight Insulation Layers: Wool or synthetic fleece. Here are some good sample options.
1 Mid-Weight Insulation Layer: Down, synthetic, or wool fill. Hood recommended. The Ortovox Zebru is one of our favorites, to give you an idea of what to be looking for.
1 Sun Hoody (recommended): A full-sleeve, loose-fitting hoody can provide welcome relief from the sun.
1 Soft Shell: Should be wind-proof and water-resistant. Hood recommended.
1 Hard Shell: Should be wind-proof and very water-resistant. Hood recommended. The Ortovox Ortler Jacket is one of our favorites.
Heavy-Weight Down Parka: This is a must, providing a warmth during rest stops, an extra layer on bitter summit days, and a margin of safety in the event of emergencies. This parka should fit well over your upper body layers and under your harness. It must have a hood. We strongly recommend a high quality down fill (750 fill rating or higher) as sythetic fill is just too bulky.
Travel&Town Clothing
Bring the travel and town clothing you need in order to be comfortable during the town portion of this trip and for any other parts of your Peruvian travel.
Personal Effects
Passport: A must have! No visa necessary. Must be valid for 6 months after your date of travel. Make two copies, bring one with you, and leave another at home. Keeping one copy “on the cloud” is also advisable.
Personal Spending Money: Some small towns won't offer credit card services. ATMs are available in Lima/Huaraz/and most bigger villages. The transaction fees generally are high (approx. USD$7). Use an ATM from a reputable Peruvian bank.
Toiletry Kit: With all the standard items you use, plus daily medications and back-up prescription copies.
Sunscreen: Best to bring a kind you know you like, versus purchasing in Peru.
Lip Balm: With sun protection.
Ear Plugs: Highly recommended.
Toe-Warmers: We recommend two pair for each summit day. One pair can go under your glove liners (lower bulk than actual hand warmers) and one pair can go on your liner sock.
Pocket Knife: No bowie knives or machetes necessary, but a little folding knife is handy.
Stuff Sacks
Camera
Medications: Bring extra of whatever daily medications you take in the states, along with the copies of the written prescription. Speak with your doctor about specific recommendations s/he has for high-altitude/remote travel. Ciprofloxacin, Azithromycin, and other broad spectrum antibiotics may be advisable. Acetazolamide and Dexamethazone may be advisable. These can all be purchased over-the-counter in Peru.
Trip Insurance
Travel Insurance: For travel-related insurance purposes, Travelguard is a good option. With many travel insurance providers, for purposes of cancellation due to any pre-existing conditions, there is a time limit between your initial deposit and when you can no longer purchase that type of policy; so if you feel you want that latitude, you should purchase a policy early-on. Please be sure to review our Cancellation Policies thoroughly.
Rescue Insurance: This is required for our international trips, and it is a very wise plan for any of your adventuring. Many people assume that with their American Alpine Club membership they are covered, but it is important to remember that coverage only goes up to $12,500. The reality of the matter is that just putting the key into the ignition of a fully-staffed rescue helicopter costs over $12,500. We highly recommend the policies offered through Global Rescue. Perusing their website you'll see they are a well-staffed, well-trained operation with experience in a range of rescue conditions. They also offer an annual policy you might find useful. Click here to enroll in either plan through Adventure Spirit.
Click here to return to the Peru Alpine Climbing Adventures page.
