The single smoothest way to go from top-out-to-rappel.
If you (and your partners) are still tethering into the anchor before going onto rappel, I do believe you're doing it wrong. Social media is so plush with techtips that it hardly needs mine, but the other day I was up at Smugglers Notch and used the following process that I felt could be helpful to share. It's a much more efficient way to go about things when using double ropes or belaying two singles. It has the added advantage of allowing you to easily get in a place that is comfortable and to view/communicate with your partners:
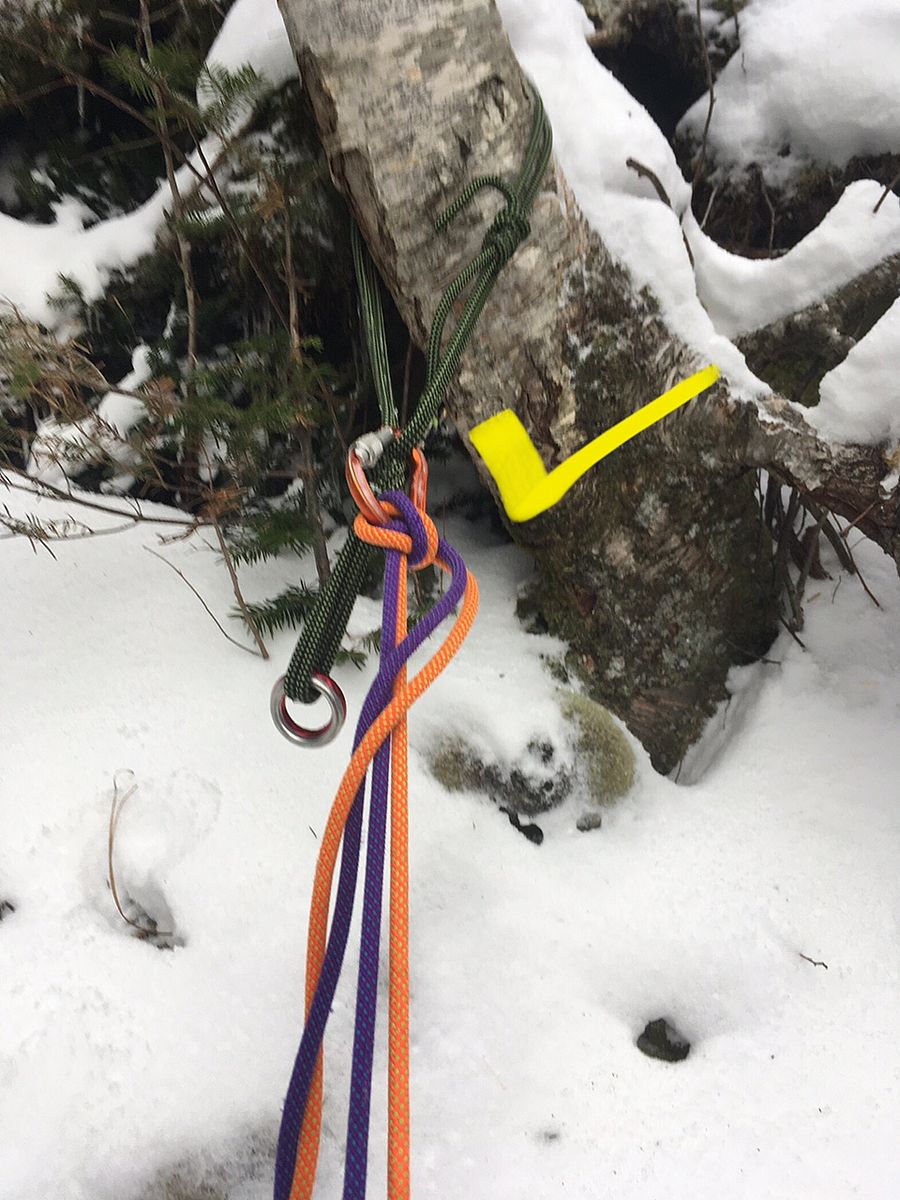
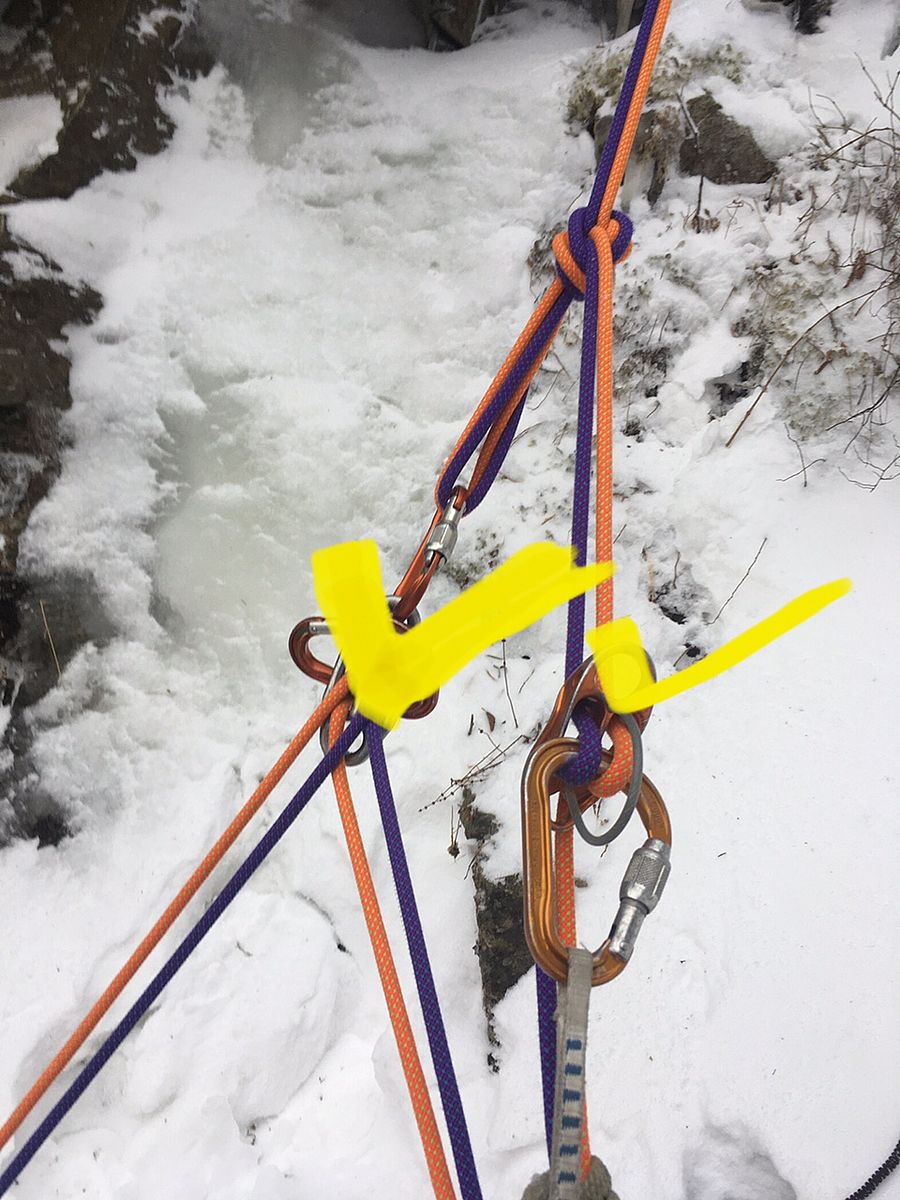
- Photo 1: After thoroughly inspecting the anchor, clove in with both strands. This serves two purposes. First, it secures you to the anchor, so you can go of belay. Second, it keeps the ropes from getting dropped.
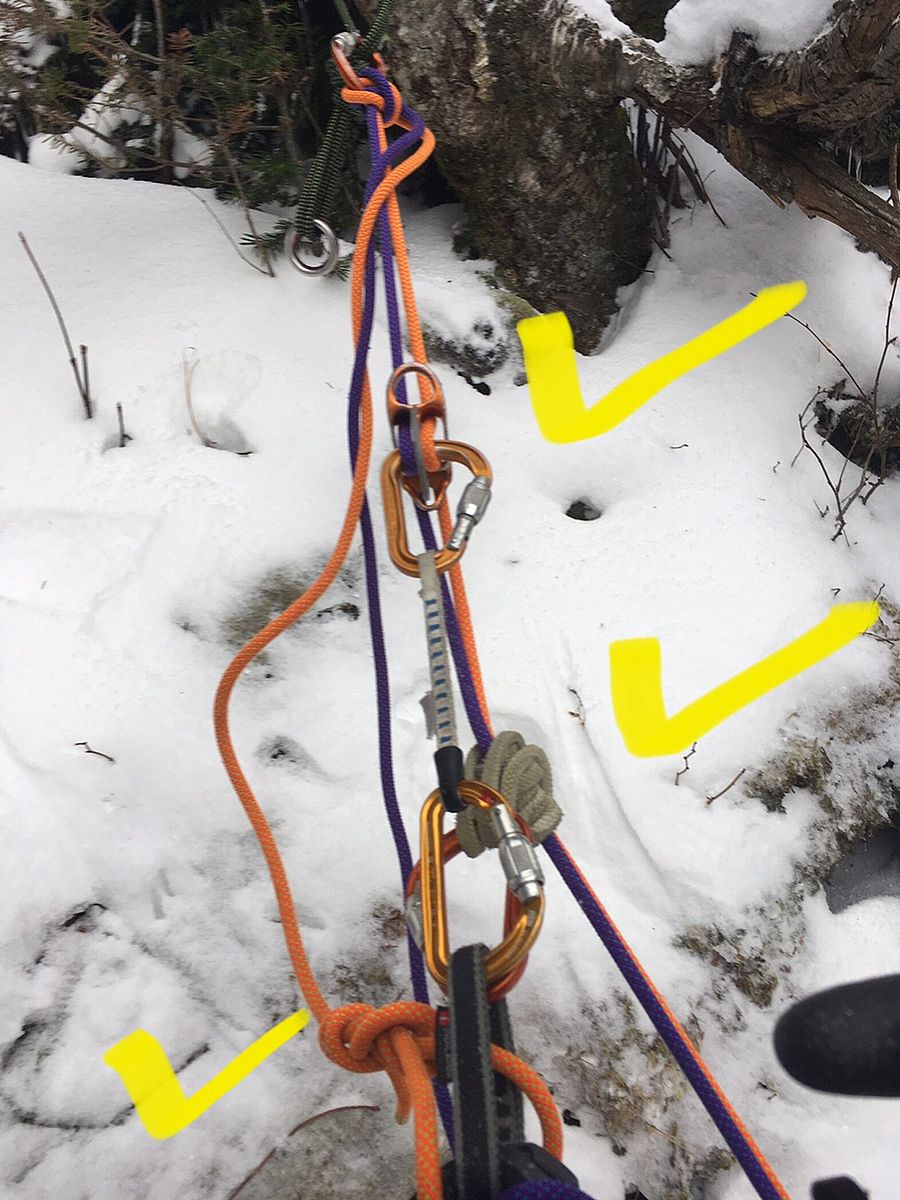
- Photo 2: Next, put your backup on (I find the autoblock to be the quickest/smoothest). Putting this on first—before your ATC—allows you to easily hold some slack for putting your ATC on. For single-pitch top-out-to-rappels, I like the simplicity of a locker draw (as seen in this photo). For multi-pitch, you'll need a tether that allows clipping into the next anchor.
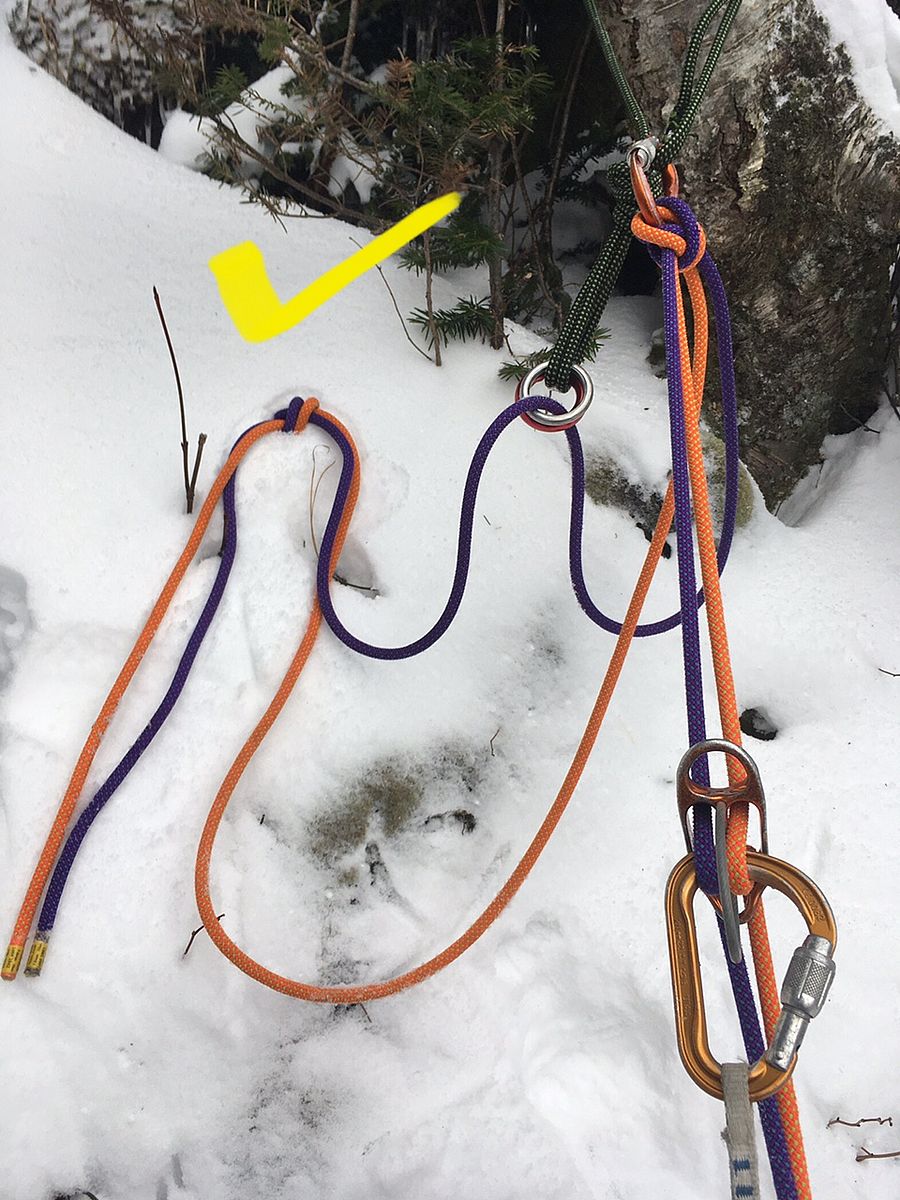
- Photo 3: Now that you're on rappel with a back-up, you can untie from the ropes, thread them through the anchor, and tie a flat overhand for rappel. You can do a leg wrap or tie a knot behind your backup if you want the extra security.
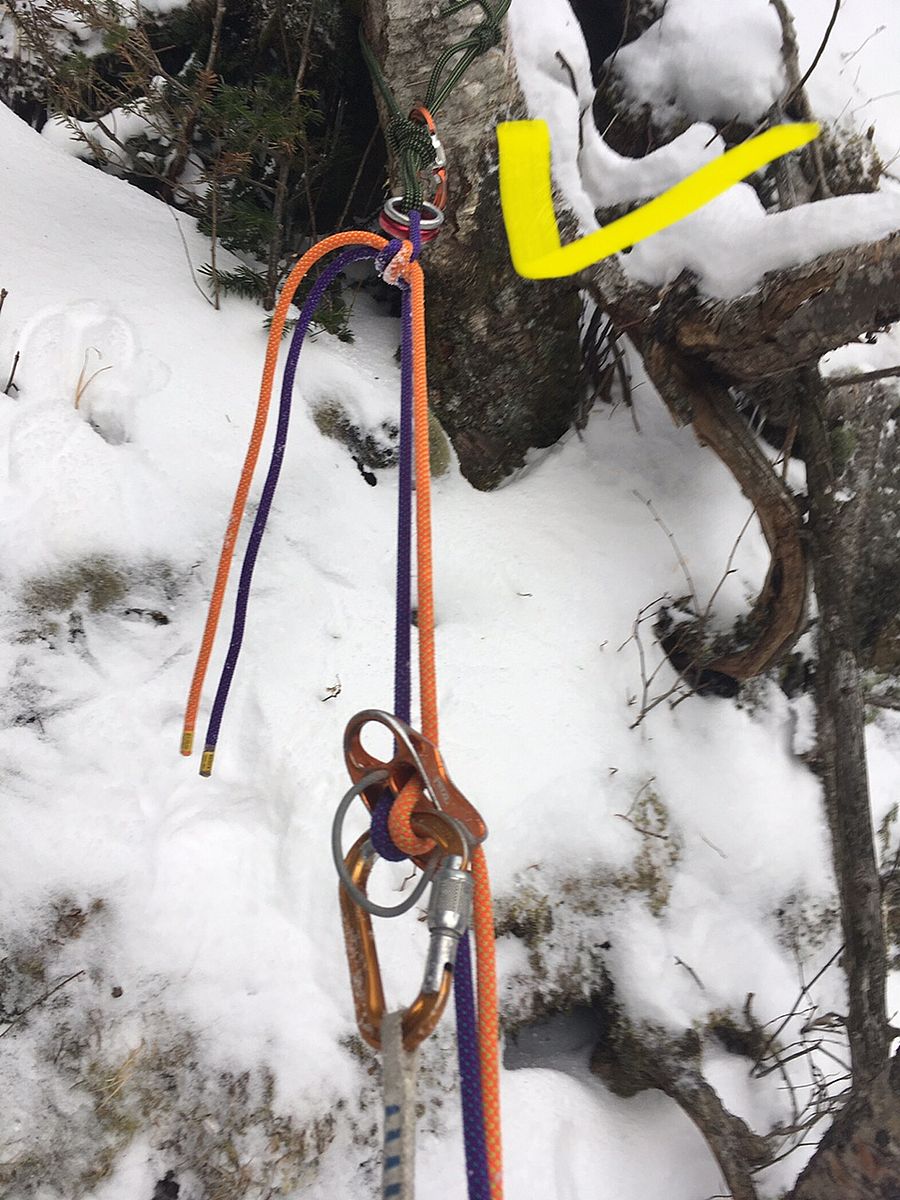
- Photo 4: Remove the initial clove hitch. You'll then need to take in the slack that this creates.
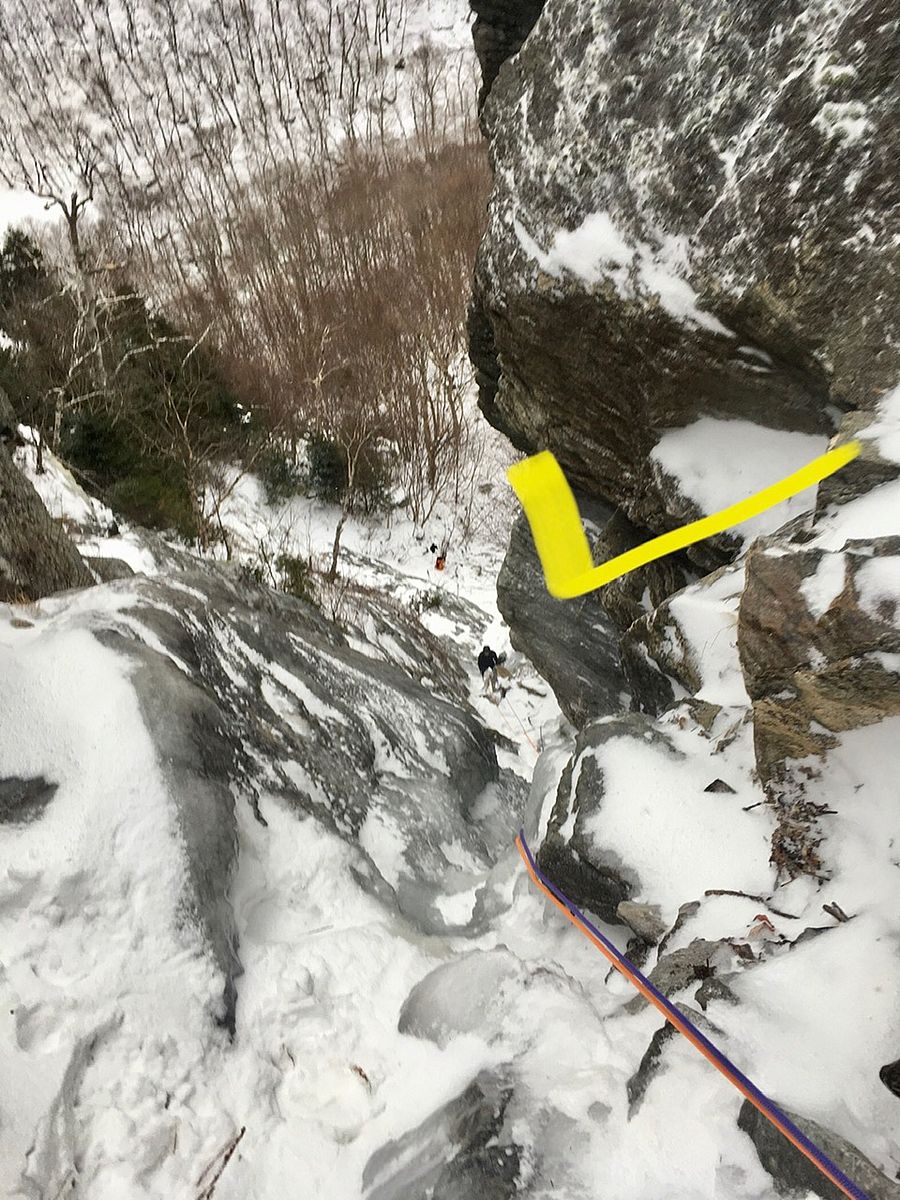
- Photo 5: Rappel down until you're in a comfortable spot where you can see and communicate with your climbers. Then, put some slack above your ATC, so that you can built an overhand on a bight. This will be your new master point. At this point I should mention that a necessary part of this whole system is that you have two plate-style belay devices with you. You could either carry two yourself or take one from the person not belaying you up to the pitch. Carrying two of your own often makes things simpler.
- Photo 6: Now you're in a comfortable place, you can view your belayers, and you're set to rappel when they arrive. If they need coaching, you can get them on rappel before leaving or you could choose to let them handle that themselves while you get back down to your puffy and thermos!
It could be that there are even more efficiencies to be added to this process. If you've got some, I'd sure love to hear about it, and I'm always looking to learn. If any of these steps are unclear to you, definitely seek out an AMGA guide specifically certified in Rock/Ice/Alpine to help clarify. They'll also be able to show you many, many more techniques to improve your safety, efficiency, and enjoyment. Climb on!